
august gardening tips

Some Gardening Secrets
(from the book 1001 Gardening Secrets, published by FC&A)
Why you need to grow basil: Basil will grow anywhere; plant it next to a tomato plant and this fragrant herb will fight off tomato pests and encourage the fruit to grow large and juicy. They even taste well together.
Secret for juicy tomatoes: For the sweetest, juiciest tomatoes ever, add powdered milk to their water. Milk is a great source of calcium, which nourishes the plant and can prevent blossom end rot.
Tomatoes love red light: Strange as this may sound, spread a red plastic mulch around your tomato plants and they will start producing like there is no tomorrow! Studies done at Clemson University show that red plastic reflects red light onto the leaves fooling the plant into believing it is in competition for sunlight with other tomato bearing plants nearby. It will then put more energy into shoots than roots. Be sure to keep the soil evenly wet and fertilized, since so much fruit above ground can compromise the roots below.
August 2013 Newsletter
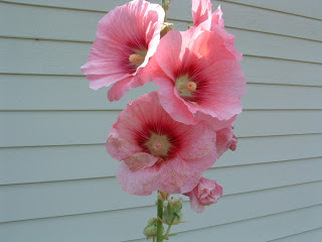
The Hollyhock (Botanical name: Alcea, Family: Malvaceae) The common name comes from"holy" plus hoc, "mallow". It may have been "holy" because it was brought back to Britain by the Crusaders and it was possibly called "hock leaf" because it was used to reduce swelling in horses hocks; but it has been grown and used for so long that it is hard to be sure of the origins of its name. Herbs found in the fifty-thousand year old grave of a Neanderthal man included the remains of hollyhocks.The botanical name of the hollyhock is from the Greek alkaia, or "mallow". Its relative, the marsh mallow, belongs to the genus Althaea, from the Greek althaia, "a cure". Garden hollyhocks and marsh mallows are the mallow, or malva, family. The wild marsh mallow was used medicinally; the root contains a mucilaginous juices aid to be very soothing and could be chewed by teething babies. Parkinson said the hollyhocks "help to make the body soluble."
* * * * * * * *
* * * * * * * *
August 2012 Newsletter
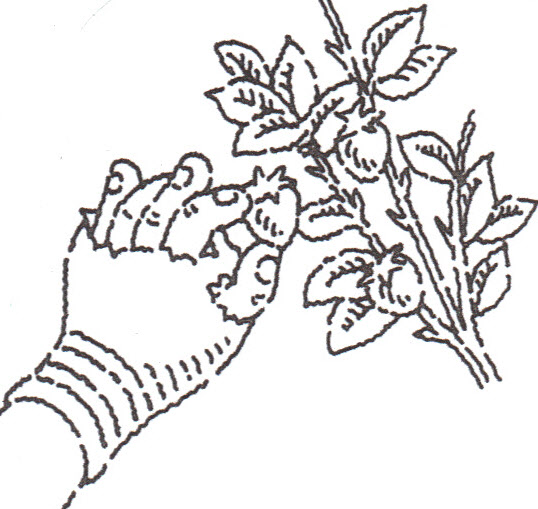
Holy Sock: Don’t toss your old cotton socks. Cut one hole in the bottom that’s big enough to fit your fingers through, and another one for your thumb. Then pull it on over your berry picking hand to protect your
arms. * * * * * * * * * * * * * |

Melon/Squash Minder: To prevent melons or squash from rotting
on the ground, cut clean plastic milk jugs in half, and place one half under each growing melon or squash. |
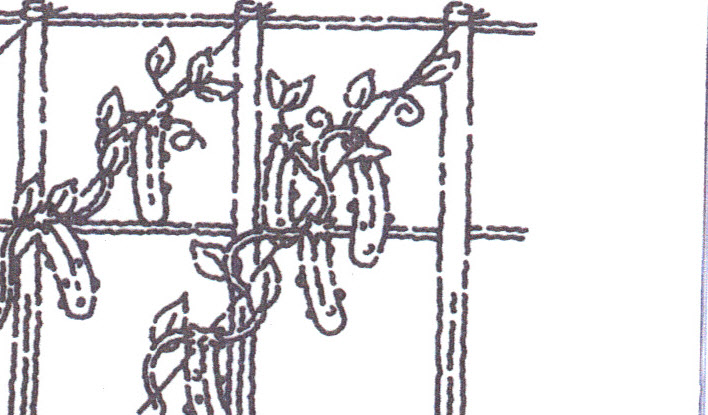
Cultivate Your Cukes: Put Isaac Newton’s theory to work in your
garden. For perfect cukes, grow them on a fence or trellis - gravity will straighten them out. |
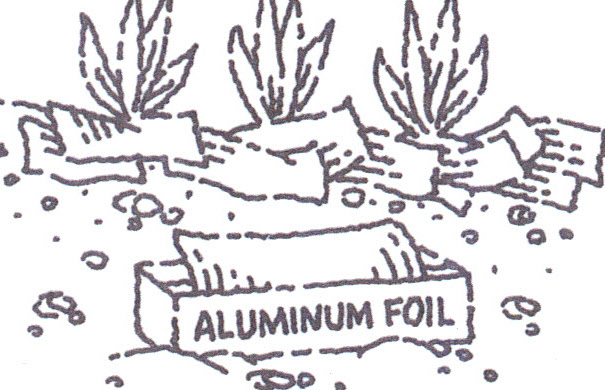
Foil Garden Felons: Aluminum foil reflects light - which some
insects can’t stand! So lay it down as a mulch around your squash, cukes, and corn to keep the local bug population in check. |
August 2012 Newsletter
The Bog Garden
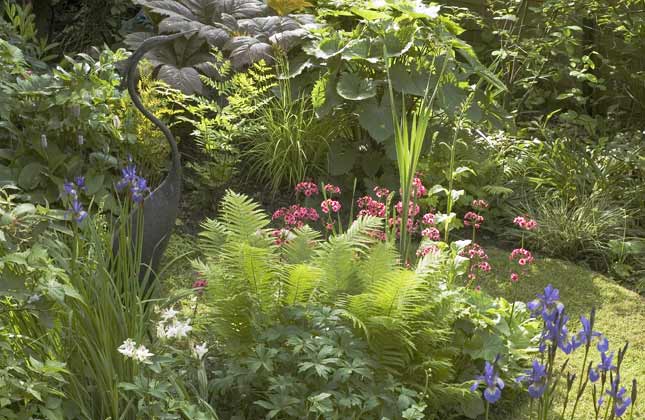
If you have a perpetually damp place in your yard that you've always considered a problem area, don't despair. Whether it's an area that doesn't drain well, floods periodically, or borders a pond or stream, let that unique situation become an intriguing, one-of-a-kind garden spot (as well as a wonderful habitat for wildlife) by selecting plants that thrive in moist places. This plan will work best in a partly shaded area (at the edge of a woods, for example) but will also be fine in a sunnier place as long as the soil never dries out. Choose a site that remains moist but not soggy or flooded for extended periods. Before planting your new garden, decide where you should place a footpath of sub- stantial flat stones that will facilitate gardening chores and leisurely strolls. Several of the varieties indicated here-the Lysimachia, Monarda, and Tradescantia in particular-will multiply rapidly and may need some reining in after a few seasons. In addition to the
perennials and ornamental Grasses indicated in the plan, add a variety of Ferns and Hostas to your damp garden.
Making a Bog Garden - Site Selection
Choose a sunny spot that gets five or more hours of full sun, and can be made mostly level. The main viewing area (path) should be from the south side. You can use rope or garden hose to mark an outline which will be
the perimeter of the bog. Leave a 6-8 foot space on the north side of this bog if you plan on using large back-ground plants such as Iris pseudacorus, Hibiscus coccineus, etc. Large plants must not shade out the bog. Bog gardens also can be placed along the edge of a water garden.
Preparing the Bog
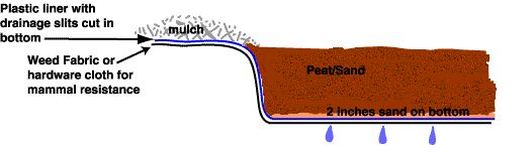
1. Dig the outlined bog to a depth of 12-14 inches, removing soil to form a basin. The bottom should be mostly flat, level or slightly pitched. The sides should go mostly straight down.
2. If moles or tunneling rodents are a problem in your area, line the basin with galvanized hardware cloth, screening, or heavy, woven weed cloth/barrier. Use
rot/rust resistant materials.
3. Line the bottom and sides of the basin with 4-6 mil plastic sheeting (on top of any mole / rodent protection.) Leave plenty of excess plastic along the edges; it can be trimmed away after the bog is filled and settled. Cut several ten-inch slits in the liner base, every foot or so. This will allow the bog to drain, while the liner holds most of the moisture in the bog.
4. Add 2-3 inches of moist sand to the bottom. Coarse sands are good to use. Do not use beach sand!
5. Fill the remaining basin with: 1 part sand + 3 parts peat moss, dampened and mixed well. Tamp the mix in place using a bow rake; this will reduce settling of the mix. The bog should be filled until it is about an inch below surrounding, existing, soil level.
6. The lining materials can be trimmed as needed. It is wise to leave about 12 inches of liner/mammal guard exposed in case the bog settles further; this edge can be hidden with mulch, pine needles, rocks, etc.
Planting
Place taller plants to the north and smaller plants closer to the viewing area. As long as smaller types don't get too much shading, they can be placed between taller types. Accents, such as stones, pools, or branches can add appeal. Avoid salt water accents, as they often contain harmful minerals. Do not use limestone or basic rocks. Sphagnum moss can be used as a ground cover, if managed. More about mosses.
Care
Constant saturation is not needed, but the soil mix should not dry out. Soaker hoses are recommended,
buried three inches below the surface and about two feet apart, to deliver efficient irrigation. Gentle hand watering is an option. Five-day watering intervals are typical, depending on weather. A mulch 6 inches deep of pine needles or oak leaves is wise in our area. This mulch should be added before first frost, then removed once temperatures are above 32° F. If plants are pushed out of the soil by ice, replant immediately. Dead leaves can be trimmed off about two inches above soil level. Do not fertilize! Feeding insects to carnivorous plants is not needed outdoors. Enjoy the show!
Bog garden Design and Plants
No water garden is complete without a bog garden as some of the most beautiful and interesting plants thrive in such situations. Many ponds and lakes have a natural perennially damp surround which requires no more
attention before introducing plants than to remove unwanted weeds. If the pond is fed by a natural water supply it is usually possible to channel the overflow into surrounding land, thus producing an area which is permanently moist without being waterlogged. Alternatively, any low-lying site with a clay subsoil can be periodically flooded over with water to produce a bog garden. During the winter months, rain will supply all the moisture that is required as most bog plants are then dormant.
To make a bog garden on raised ground or where the drainage is very free, creates a different problem which,
however, can be overcome with a little effort. Excavate the site to a depth of 38cm (15in) and line the area with poor quality concrete consisting of 12 parts of ballast to 1 part of cement or even weaker, or cover the base with slates, tiles or asbestos sheets slightly overlapping. Another idea is to line the base with a single layer of 500 gauge polythene sheeting perforated in a few places so that it allows water to leak away slowly.
Whatever method is employed, put 6-8cm (23in) of stones or pebbles over the lining to provide adequate drainage. Cover these with a layer of peat tailings or old turves turned upside down. Replace the soil, incorporating liberal quantities of peat, manure or other fibrous material to hold the moisture during times of drought. When finished, the top soil will look like any other herbaceous border, but the roots of the plants will feel the influence of the water, and such conditions should produce an ideal bog garden. Although it is important to water the area in dry weather, it is equally important never to allow the soil to become water-logged.
Suitable Plants
There is a wide range of plants suitable for the bog garden. Some of the more popular and interesting kinds include the aconitums (monkshood). The most commonly grown species is A. napellus, with finely cut leaves and purplish-blue flowers, its variety bi-color, with blue and white flowers, and 'Newry Blue', flowering June - July on 1-1.3m (3-4ft) stems.
Aruncus sylvester (goat's beard) if space permits, is a wonderful plant for the back of the bog garden, with large plumes of creamy-white flowers in June and foliage very similar to that of the astilbes and growing to 1.3-1.6m (4-5ft). The numerous varieties of astilbe make excellent bog garden plants, but unfortunately they are frequently grown in dry borders with inadequate moisture, where they never acquire their full splendor. Some of the most popular varieties include: 'Deutschland', pure white, 'Fanal', deep red with reddish foliage, 'Koblenz', rose, 'Red Sentinel', very deep red and 'Rhineland', bright pink.
The native marsh marigold (Caltha palustris) in both its single and double-flowered forms, is a fine plant for
really moist soils. It makes a bold splash of yellow in spring. Gunnera manicata is probably the most impressive bog plant it is possible to grow in this country, but it is only suitable where there is ample room, as in a large water garden. The foliage resembles enormous rhubarb leaves, often reaching 2.5-3.3m (8-l0ft) in diameter, on stems 3.8m (12ft) or more in height. The flowers are brown-borne in heads about m (3ft) long and something like a bottle brush in appearance. Gunneras require plenty of moisture during the growing season but must not become waterlogged, especially during the winter months, when it is necessary to give the crowns protection by packing the dead leaves over the roots. Extra protection with straw or leaves should always be added in very severe weather.
No garden is complete without hemerocallis (day lily). The species come from Asian riversides and will grow anywhere in the bog garden, in shallow water, in shade or full sun, in heavy wet soil or dry sandy situations. Many hybrids have been produced, giving a wide variety of color from pale yellow to deep red and a flowering period from June to September. Given ample room for development, the plants may be left undisturbed for years. A vast range of hybrids include: 'C. P. Raffill,' 0.7m (lift) apricot flowers, July-August; `High Tor,' 2m (6ft) or more in height, yellow flowers, June-July; 'Pink Damask,' rich pink, and 'Hiawatha,' 0.7m (2 1/2ft), copper-red.
Hostas are invaluable semi-shade plants with leaves in various shades of green or green and silver or gold variegations and pale mauve or white flowers.
Species include H. fortunei alba, yellow leaves edged with green; H. sieboldiana, blue-green foliage; H. undulata, large oval leaves; H. minor, 30-38cm (12-15 in), pale green leaves and white flowers. Iris kaempferi and its forms are the most notable of the bog iris. Natives of Japan, they are grown beside the paddy fields which are flooded during the summer months but drained in the winter, thus producing ideal growing
conditions. As they are lime haters, they must have adequate peat or leaf mold in the soil. These plants are rarely sold as named varieties, but usually as the 'Higo Strain' of hybrids.
Lysichitum americanum, the skunk cabbage, indigenous to North America, has large bright yellow arum flowers in April, before the leaves, which make a bold show at the pool side during the summer months. L. camtschatcense from Japan has white flowers and is less vigorous than its American counterpart.
Bog primulas provide some of our best waterside perennials, especially when grown in semi-shade with a background of moisture-loving ferns. Among the best are P. florindae, 0.7m (2.5 ft) sulphur-yellow flowers, June-July; P. japonica splendens, crimsonpurple, May-June; P. japonica 'Postford White', an outstanding candelabra type with white flowers; P. pulverulenta 'Bartley Strain', rose-pink flowers, May-June and P. viali, with mauve flowers, which has bright red buds before opening.
Moisture-loving ferns make an excellent background for bog and water gardens with some shade. Matteuccia truthiopteris, the ostrich feather fern, has symmetrical 1m (3ft) long fronds like a shuttlecock. Onoclea sensibilis (the sensitive fern) thrives in shade and moisture and has pale green fronds, 0.3-0.4m (1-1.5 ft) long; Osmunda regalis the royal fern is a noble plant, easily grown if given an adequate water supply. When well established it reaches 1.6-2m (5-6ft) in height and will set off any bog or water garden.
|
August 2012 Newsletter
The Bog Garden A collection of moisture-loving plants If you have a perpetually damp place in your yard that you've always considered a problem area, don't despair. Whether it's an area that doesn't drain well, floods periodically, or borders a pond or stream, let that unique situation become an intriguing, one-of-a-kind garden spot (as well as a wonderful habitat for wildlife) by selecting plants that thrive in moist places. This plan will work best in a partly shaded area (at the edge of a woods, for example) but will also be fine in a sunnier place as long as the soil never dries out. Choose a site that remains moist but not soggy or flooded for extended periods. Before planting your new garden, decide where you should place a footpath of substantial flat stones that will facilitate gardening chores and leisurely strolls. Several of the varieties indicated here - the Lysimachia, Monarda, and Tradescantia in particular - will multiply rapidly and may need some reining in after a few seasons. In addition to the perennials and orna-mental Grasses indicated in the plan, add a variety of Ferns and Hostas to your damp garden. This garden includes 60 plants of 17 cultivars. Substitutions of similar plants may be made if some varieties are not available. Helpful Hints The bog garden is solution oriented. That low spot in your yard that is too wet to grow lawn can easily be transformed into an attractive perennial garden. For best results, plant in a location of full to part sun where the soil never dries out. If you're not fortunate enough to have a bog location, you can easily create one. Dig a shallow indentation in the ground, cover with plastic sheeting, poke drainage holes and back fill. improve your bog soil by adding organic matter, such as compost and mulch, to the top four to six inches of soil. * * * * * * * * * * * * * |

Plant in groups of three except where indicated.
a. Aruncus dioicus (1) Height 4-6', Spacing 24-36". b. Astilbe 'Snowdrift' Height 24", Spacing 12-15". c. Astilbe chinensis var. 'Purple Candles' Height 42-46", Spacing 15-18". d. Astilbe 'Ostrich Plume' Height 36", Spacing 18-24". e. Bergenia 'Autumn Glory' Height 6-12", Spacing 10-12". f. Chelone 'Hot Lips' Height 36", Spacing 15-18". g. Deschampsia 'Northern Lights' (1) Height 24-36", Spacing 24-30". h. Deschampsia caespitosa (1) Height 36", Spacing 24-30". i. Galium odoratum Height 7-10", Spacing 8-12". j. Iris 'Dreaming Spires' Height 36", Spacing 18-24". k. Ligularia 'Desdemona' (1) Height 36-48", Spacing 24-36". l. Ligularia przewalskii Height 5-6', Spacing 24-36". m. Monarda 'Marshall's Delight' Height 36-48", Spacing 18-24". n. Phalaris 'Dwarf Garters' Height 12-15", Spacing 16-20". o. Tradescantia virginiana Height 18-24", Spacing 18-24". p. Trollius 'Gold Queen' Height 36", Spacing 12-18". q. Viola labradorica Height 1-4", Spacing 10-15". |
August 2010 Newsletter
YARD WORK REMINDERS
During a dry spell, mow your lawn less frequently and raise the blades on your mower so you don’t clip the grass too short.
Cut dahlias as often as you can to encourage more flowers to form. For longer stems and spectacular single blooms, clip off the side buds.
To dry the smaller, ornamental sunflowers, cut them in mid-morning, leaving lots of stem. Hang them upside down in a dark, well-ventilated area for about 3 weeks.
Shake the seeds out of dried hollyhock pods and plant them in pots. As soon as the shoots emerge, move them to a permanent location.
Cut phlox to the ground when it stops flowering to prevent the spread of powdery mildew.
Zone 4
• Lift, divide and transplant perennials
• Order peonies for fall planting
• Divide and transplant bearded iris
• Start moving houseplants and other tender plants indoors to acclimatize
• Enjoy a case of the late summer "blues" with a palette of aconitum, caryopteris, fall asters and re-blooming iris in your planting schemes
• Blanch tomatoes for freezing and canning by boiling them for just a few minutes and slipping off the
skins
• Plant fall-blooming crocus and colchicum for late-season flowering
• Prepare beds for planting bulbs and divide any existing bulbs that might be overcrowded
• Build up weather resistance of trees and shrubs with deep watering now throughout the fall
• Look forward to something different next spring: try alliums in your bulb garden.
August Hints
*Pick summer squash and zucchini every day or two to keep the plants producing.
*Many herbs self-sow if the flowers are not removed. Dill produce seeds that fall around the parent plant and come up as volunteers the following spring.
*White flies are attracted to yellow, so use yellow sticky boards to reduce their populations.
Watering The Garden
Stick your finger an inch into the garden soil. If it feels dry, the garden needs water.
Water your plants early in the morning, when moisture evaporates more slowly than during the heat of the day.
To keep your hose from kinking as you round tight corners, anchor it in a gentle arc with croquet wickets or strategically placed stakes or stones.
Roll up your garden hose and put it away after every use. Direct sunlight will weaken it.
When you buy a watering can, choose one that holds at least two quarts, fits under your faucet, and has an angled spout so water won’t spill out.
* * * * * * * * * * * *
August 2010 Newsletter
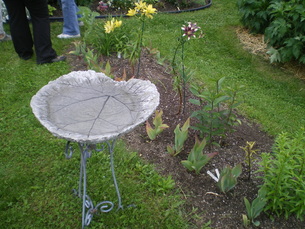
Sand-Cast Birdbath
Synopsis of article in Garden Gate Magazine, Issue 53
(submitted by Florene)
Materials:
1 large leaf
1 40 lb. Bag of sand (or equivalent)
1 40 lb. Bag of premixed concrete
1 sheet of plastic (or plastic wrap)
Concrete Sealer (such as Thompson’s)
Paint or concrete dye (if desired)
Water
Tools:
Wheelbarrow for mixing
Shovel
Scrub brush
Paint brush
Step 1: Start by making a dome shaped pile of sand that is big enough for the entire leaf to rest on plus a couple of inches to spare. Cover the complete dome with plastic.
Step 2: Lay the leaf face down on top of the sand. Adjust sand if necessary to make sure the leaf is fully
supported.
Step 3: Pour the dry concrete into the wheelbarrow and add water until it’s the consistency of a thick brownie mix. Scoop some concrete onto the center of the leaf and begin working it toward the outer edge. Make it thick enough in the center to cover the leaf veins (about ¾“) and taper out to about ¼” on the edge. (If adding the wire from the coat hanger, do it here). Cover with plastic. If it is very hot cover also with wet burlap so the concrete dries evenly. Give it at least 48 hours to dry.
Step 4: After 48 hours remove the top layer of plastic and turn your concrete leaf over. Have a friend help turn over in case the concrete hasn’t dried thoroughly. Pull off the second sheet of plastic wrap and start pulling out the leaf. Most of it comes out easily, but if it doesn’t you may have to scrub a bit. The concrete now needs to cure for a week, so wait to paint or add water.
Step 5: Paint your leaf. Add a coat of concrete sealer, such as Thompson’s Water Seal or Dry Lock for protection. If you choose to add color at this point use a wash of about three drops of paint to two cups of water. You can repeat painting until color you desire is reached. The veins can be accented by painting them with a different color, using a small brush.
* * * * * * * * * * * * *
August 2010 Newsletter
Harvesting Hints for Vegetables
When you pull carrots, wash them off with the hose and cut off the green tops. (Leaving the tops on will make the carrots limp.) Store in plastic bags in the refrigerator.
Patrol your Zucchini patch daily and pick the squash when they’re about eight inches long. Feed your compost – or your chickens – those baseball bat-size zucchini and feel no guilt.
Harvest onions for storage when the tops have turned brown and keeled over. Let the onions sit on top of the dirt (as long as it is dry) for a day before storing.
* * * * * * * * * * * * *
August 2010 Newsletter
The Herb Corner
Fireweed
by Florene
(Epilobium augustifolium)
Fireweed? Yes, Fireweed! As you know, this plant can grow up to eight-feet high, spreads rapidly, and its bright blossoms are a cheerful sight along the roadways. The name came from its ability to deposit seeds deep into the soil. After a fire when all other plant life may be gone, those seeds will germinate and add life back to the land. It is often found in our flower beds and gardens where we’d just as soon it didn’t go. However, Fireweed does have some redeeming qualities. The blossoms can be made into syrups, jellies, drinks and even ice cream. The young shoots can be eaten like asparagus and the raw stalks can be used as a poultice to draw the pus out of open wounds. The flowers also have anti-inflammatory properties and can be used to help skin irritations, including rashes, burns and acne.
In the latest issue of The Herb Quarterly, the author suggests making a soothing wash of one small handful of fresh flowers (plucked just before they open) to 1 to 2 cups of hot water. Let steep for 15 minutes and apply topically to the affected skin area.
I Googled “Fireweed” and found that there are many sites with recipes. I went to one called “Alaskan Recipes” and found the following recipe for Fireweed Jelly. Now you can put those rascals to work – make jelly, syrup, a soothing wash and put a bouquet on your table.
Fireweed Jelly
8 cups fresh Fireweed petals
¼ cup lemon juice
4 ½ cups water
2 packages powdered pectin
5 cups sugar
Gently rinse the flower petals and pat dry, taking care to remove any leaves or stems (which can make the jelly bitter). Place in a saucepan and add lemon juice and water. Boil for 10 minutes; strain out flowers. You
should have a red liquid at this point.
When the liquid is lukewarm, add the powdered pectin and bring to a boil. (without the pectin, you will have Fireweed syrup, another delicious treat.) Add the sugar and bring the mixture to a full boil. Boil hard for one minute.
Remove from the heat and follow standard canning procedures.
* * * * * * * * * * * * *
August 2010 Newsletter
How to Handle Berries and Peaches
Do not pick berries that are wet from dew or rain; you can spread mildew and other diseases.
Store fragile berries, such as raspberries, in a single layer in the refrigerator. Do not wash them before storing. Better yet, eat them as soon as possible.
To freeze fresh blueberries and raspberries, place them on cookie sheets in a single layer and pop them into
the freezer. As soon as they are frozen solid, transfer them to plastic bags and use as desired in muffins, pancakes, and cobblers.
Pick 4 cups berries for a 9-inch pie.
Choose tree-ripened peaches and buy only as many as you can use within a few days. Unripe peaches will not sweeten after they are picked.
To peel peaches easily, blanch them first: Cut an X into the skin of each peach at the pointed end. Submerge in oiling water for a minute or two, until skin loosens. Quickly transfer from the boiling water to a bowl of very cold water. When cool, peel with a paring knife.
* * * * * * * * * * * * *
August 2010 Newsletter
Perennials, Annuals, and Bulbs
Take out a few minutes to pick off the old dead flowers on your annuals, as well as the spent flowers on perennial plants. A little time spent on grooming the plants will make a big difference in the overall appearance of the garden. By removing the spent flowers, the plants will not go into the seed producing stage and should continue to flower longer into the season.
Perennial and biennial plants can be started from seed sown directly into the garden this month or next.
Container grown perennials, shrubs and trees can be planted this month. Always take time to properly prepare the soil by mixing generous quantities of peat moss, compost and processed manure with your existing soil.
Fall blooming Crocus should be planted this month, to give you an extra week or two of flowers after the main garden plants have finished for the year.
Spring flowering perennials can be divided and transplanted this month or next. Be sure to do this during the
coolest part of the day and water the plants thoroughly after transplanting.
Prune your hybrid roses in late August to promote the most fall blossoms. Remove about a third of the vigorous growth. Any stems that cross each other should be removed, as well as those that are in the center of the plant. Weak, spindly canes and any damaged by black spot fungus should be removed. Except in colder regions, roses should be fertilized through the end of September. Maintain a spraying schedule to control insects and disease.
* * * * * * * * * * * * *
August 2010 Newsletter
Totally Tomatoes
Four or five medium tomatoes weigh about one pound. Peeled and seeded, this yields about 1-1/2 cups tomato pulp.
The speediest way to ripen tomatoes is to place them in a brown paper bag with an apple or pear. (These fruits emit ethylene gas, which hastens ripening.) Do not put them on a sunny windowsill to ripen; they may rot before they are ripe.
To store ripe tomatoes, place them in a cool spot in a single layer with the stem ends up. Never refrigerate tomatoes. Always serve at room temperature for maximum flavor.
Instead of a tossed salad, offer a simple platter of sliced tomatoes sprinkled with chopped fresh basil leaves and coarse salt and drizzled with extra-virgin olive oil.
To help your body beat the heat, drink plenty of fluids and minimize your intake of protein-rich foods. Try a ripe tomato, right out of the garden, instead.
To prevent tomato sauce from staining a plastic storage container, spray the container lightly with nonstick cooking spray before filling.
August 2010 Newsletter
Growing Great Produce
Once the fruit forms, water squash and pumpkins diligently to coax them to the largest size.
Suspend melons in nylon mesh, secured to a tepee or trellis, to save garden space and keep the fruit from
rotting in contact with the soil.
If bean plants look scraggly as they start to flower, fertilize them with fish emulsion. Avoid high-nitrogen
fertilizer, or you’ll have bushy plants and no beans.
Faithfully snip off flowers that form on basil and lemon verbena plants. This will keep them bushy and
flavorful.
* * * * * * * * * * * * *